Are you tired of using disposable plastic straws and looking for a more eco-friendly alternative? Stainless steel straws are a great option, as they are reusable and durable. However, keeping them clean and carrying them around can be a challenge. That’s where this step-by-step guide comes in handy! In this guide, we will show you how to make a DIY carrying case for your stainless steel straws. With just a few simple materials and easy-to-follow instructions, you’ll have a convenient and stylish way to transport your straws wherever you go. So, say goodbye to plastic waste and hello to your new eco-friendly stainless steel straw carrying case!
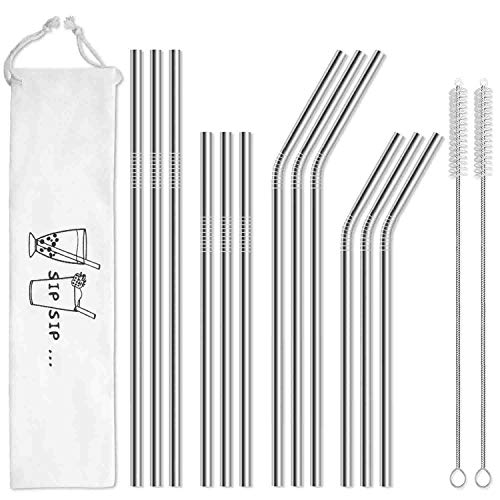
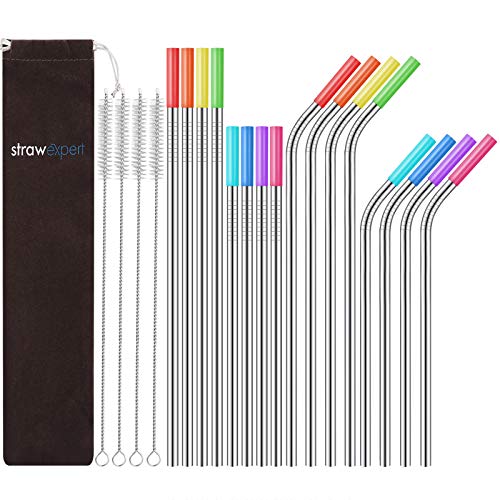
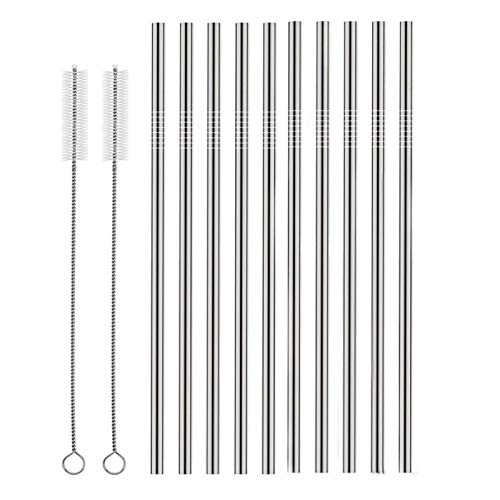
Sip in Style with These Top Picks!
Create Your Own Reusable Drinking Straw Pouch with These Easy DIY Steps
Gather Materials
To gather all the necessary materials for making a DIY carrying case for stainless steel straws, here’s what you’ll need:
- Fabric: Choose a durable fabric that will protect your straws and withstand regular use. You can opt for cotton, canvas, or any other fabric of your choice.
- Scissors: A good pair of scissors will come in handy for cutting the fabric to the desired size and shape.
- Sewing machine or needle and thread: Depending on your preference and skill level, you can use either a sewing machine or a needle and thread to sew the fabric together.
- Ruler: Use a ruler to measure and mark the dimensions of the fabric accurately. This will help ensure that your carrying case is the right size for your stainless steel straws.
- Buttons or snaps for closure: You’ll need buttons or snaps to securely close your carrying case and keep your straws in place.
Now that you have all the necessary materials, you’re ready to embark on your DIY project. Remember to take your time and follow the instructions carefully to create a functional and stylish carrying case for your stainless steel straws. Happy crafting!

Measure and Cut Fabric
To measure and cut the fabric into two equal-sized rectangles for the main body of the carrying case, follow these simple steps:
- Gather your materials: Start by gathering the fabric you want to use for your carrying case, along with a measuring tape, fabric scissors, and a marking tool like chalk or a fabric pen.
- Measure and mark: Lay the fabric flat on a clean, flat surface. Measure and mark out two rectangles of equal size using the measuring tape and marking tool. Make sure the measurements are accurate and that both rectangles are the same size.
- Cut the fabric: Once you have marked out the measurements, carefully cut along the lines using fabric scissors. Take your time and make precise cuts to ensure clean edges.
- Double-check the sizes: After cutting, double-check that both rectangles are indeed equal in size. Lay them side by side to compare. If there are any discrepancies, trim the edges as needed to make them match.
By following these steps, you will successfully measure and cut your fabric into two equal-sized rectangles, which will serve as the main body of your carrying case. Happy sewing!
Sew the Edges
To sew the edges of the fabric, start by folding the fabric over about half an inch on all sides. Use your fingers to press the fold firmly in place. Next, take your sewing machine or needle and thread and begin stitching along the folded edge. If using a sewing machine, set it to a straight stitch and guide the fabric under the needle, making sure to keep the stitches even and straight. If sewing by hand, use a straight stitch and secure the thread by making a knot at the end. Continue sewing all around the edges, keeping a consistent distance from the folded edge. Remember to leave one edge open for inserting the straws. Once you have finished sewing, trim any excess thread and give your edges a final press with an iron to make them neat and crisp. Now your fabric is ready for inserting the straws and completing your project.
Attach Closure
To attach buttons or snaps to the open edge of the fabric and create a closure for the carrying case, follow these simple steps:
- Gather your materials: You will need buttons or snaps, a sewing needle, thread in a matching color, and a pair of scissors.
- Decide on the closure type: Choose whether you want to use buttons or snaps as your closure. Buttons are a classic choice, while snaps offer a more convenient and secure option.
- Place the buttons or snaps: Measure and mark the location where you want to attach the closure on the fabric edge. For buttons, make sure to place the buttonholes opposite the buttons, ensuring a snug fit. For snaps, make sure to position them in a way that aligns when the fabric is closed.
- Attach buttons: Thread your needle and tie a knot at the end. Starting from the inside of the fabric, push the needle through one of the buttonholes, then through the corresponding buttonhole on the opposite side. Repeat this process several times, ensuring the button is securely attached. Finish by tying a knot on the inside of the fabric and trimming any excess thread.
- Attach snaps: Thread your needle and tie a knot at the end. Starting from the inside of the fabric, push the needle through one side of the snap, then through the corresponding location on the opposite side. Repeat this process several times, ensuring the snap is securely attached. Finish by tying a knot on the inside of the fabric and trimming any excess thread.
Examples:
- For buttons, you could attach two round buttons, one on each side of the fabric edge.
- For snaps, you could attach a male snap on one side and a female snap on the opposite side of the fabric edge.
Remember to take your time and ensure that the closures are securely attached. With these instructions, you’ll be able to create a functional and stylish closure for your carrying case. Happy sewing!
Decorate and Personalize
To personalize and add a unique touch to your carrying case, feel free to decorate it in any way you like. One option is to embroider your initials or a special design onto the fabric. You can choose colorful thread and use different stitches to create a beautiful and personalized embroidery. For example, you could add your name in a fancy script or create a small image that represents something you love, like a heart or a flower. If embroidery is not your thing, another idea is to add patches. You can find patches with various designs, such as your favorite band, a sports team, or a cute cartoon character. Simply sew or iron the patches onto the fabric of the carrying case, and instantly give it a personalized look. Remember, the possibilities are endless, so get creative and make your carrying case truly one-of-a-kind!
Insert and Store Straws
To insert the stainless steel straws into the carrying case and securely close it, follow these simple steps:
- Open the carrying case: Gently unzip the case to reveal the interior compartments.
- Prepare the straws: Ensure that your stainless steel straws are clean and dry before inserting them. If they are not, rinse them thoroughly with warm water and dry them with a cloth.
- Arrange the straws: Take each stainless steel straw and place it neatly into the designated slots inside the carrying case. Make sure to insert the straws all the way in, ensuring they are secure and won’t fall out.
- Close the case securely: Once all the straws are inserted, carefully close the carrying case. Depending on the design, you may have buttons or snaps to secure the case. Attach them properly to ensure the case remains closed during transportation.
- Check for stability: Gently shake the closed carrying case to ensure the straws remain securely in place. If you notice any movement or loose straws, reopen the case and readjust them accordingly.
Remember, properly inserting and closing the stainless steel straws in the carrying case ensures their safe storage and easy portability. By following these steps, you can confidently transport your reusable straws without worrying about any damage or loss. Happy sipping!
Wrap it up and enjoy!
In conclusion, making your own DIY carrying case for stainless steel straws is a fun and practical project that allows you to keep your straws organized and protected while on the go. By following the step-by-step guide outlined in this post, you can create a personalized carrying case that suits your style and meets your needs. Remember to choose durable and eco-friendly materials, such as fabric or silicone, and consider adding extra pockets or closures for added convenience. With your homemade carrying case, you can say goodbye to tangled straws and single-use plastic, and hello to a more sustainable and organized straw-carrying solution. Happy crafting!
Get Prepared!


Handy Hacks
Using Your Stainless Steel Straws is a Breeze!
- Rinse before use: Before using your stainless steel straw for the first time, make sure to rinse it thoroughly with warm water and mild soap to remove any manufacturing residue
- Insert the straw into your beverage: Place the stainless steel straw into your drink, just like you would with a regular straw. Make sure it reaches the bottom of the glass or cup
- Sip and enjoy: Simply sip your beverage through the stainless steel straw. The smooth and durable material will not alter the taste of your drink
- Clean after use: After enjoying your drink, it’s important to clean your stainless steel straw properly. Rinse it with warm water immediately after use to prevent residue from drying. You can also use a cleaning brush specifically designed for straws to remove any particles stuck inside
- Store properly: To keep your stainless steel straw in great condition, make sure to store it in a clean and dry place. Consider using a small bag or container to protect it from scratches
- Remember, using stainless steel straws is an eco-friendly alternative to single-use plastic straws, so enjoy your drinks while helping the environment at the same time!